Trading can feel like walking in the dark. We’ve all been there, staring at a chart full of candles, entering trades on impulse, and then watching our account slip away. Those moments taught us a painful truth: without a clear system, emotions take over. That is where the 1-3 setup trading patterns changed everything for us.
We first heard about this strategy in a trading group, but it wasn’t until we applied it step by step that we realized its real value. It gave us a framework to spot entries with logic instead of luck, to place stop losses with reason, and to aim for a risk-to-reward that finally made sense.
If you’ve ever felt lost between chasing trends and fearing reversals, this setup might become the foundation you were missing. In this guide, we’ll explain what the 1-3 setup means, how to identify it on different markets, and why it helps traders move from guesswork to discipline.
Key takeaways:
- To be clear, the name 1-3 setup trading patterns isn't something you'll find in every classic textbook. It's simply what our group started calling a fundamental three-step approach in Pattern trading to keep things straightforward and memorable.
- Traders can identify the pattern by recognizing the main trend, a corrective move, and a confirmation point.
- Entry and exit rules, combined with a solid risk-to-reward ratio, help create more consistent results.
- Using indicators like RSI, MACD, or Fibonacci can strengthen confirmation in different timeframes.
- When you apply discipline to the 1-3 setup trading patterns and manage your risk properly, your consistency is what truly improves.
- Common mistakes include entering too early, ignoring confirmation, or risking too much capital.
1. What is the 1-3 setup and why should traders care?
The 1-3 setup trading patterns (often referred to in classic texts as the 1-2-3 pattern) are a simple yet powerful way to bring order into the chaos of market moves. In its essence, the setup has three parts: a clear trend, a corrective pullback, and a confirmation point where the trade makes sense.
When we first came across this setup, it sounded almost too simple. But after blowing up a few accounts by chasing candles without a plan, we realized simplicity is exactly what we needed. The 1-3 formation gave us rules to follow, not just feelings to trust.
For new traders, this setup often comes up in conversations with mentors or within forex and crypto communities. The reason is clear: it creates structure. Instead of guessing where to enter, you have a logical step-by-step approach. Instead of holding on blindly, you know when the trade is invalid.
The emotional side of trading cannot be ignored. We remember one trade on EUR/USD where our instincts screamed “buy now,” but the setup told us to wait for confirmation. That patience saved us from a false breakout and reminded us why having rules matters.
Summary:
- The 1-3 setup is a framework that helps traders recognize entry and exit opportunities with clarity.
- It matters because it reduces guesswork, gives discipline to beginners, and replaces emotion with structured decision-making.
2. The structure of the 1-3 setup trading patterns
At first glance, the 1-3 setup trading patterns might look too basic. But once we broke it down into its three simple steps, it felt like someone finally handed us a map for navigating the market.
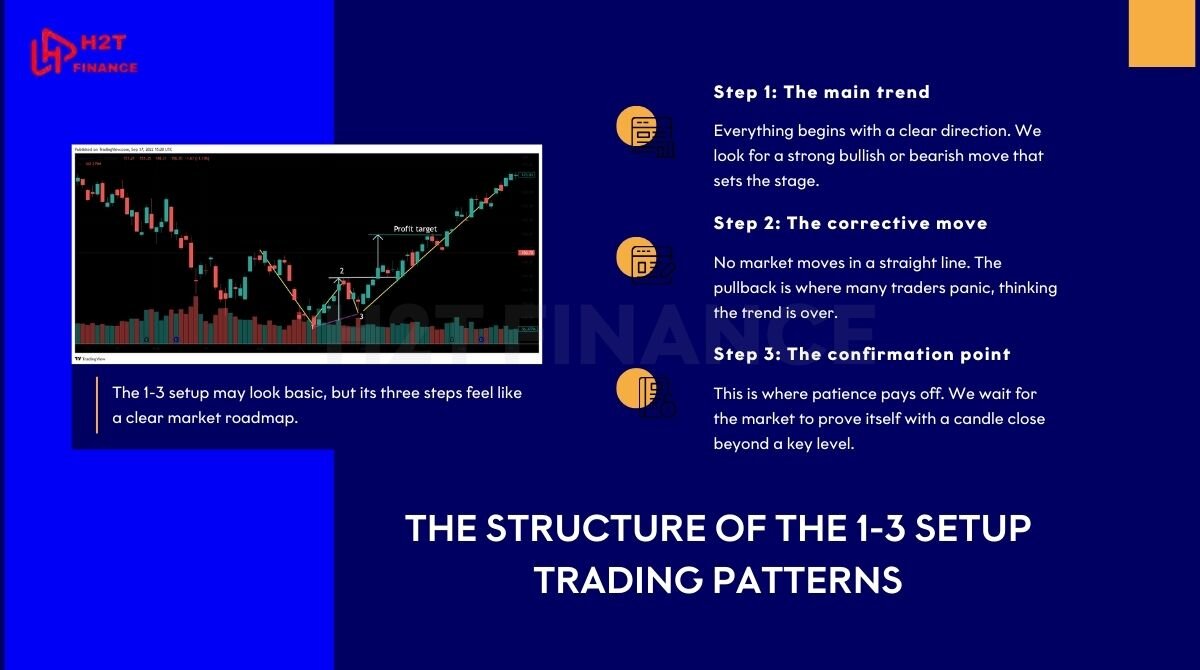
Step 1: The main trend
Everything begins with a clear direction. We look for a strong bullish or bearish move that sets the stage. Without this backbone, the rest of the setup falls apart. We remember charting Bitcoin during a strong rally in 2020 the trend was unmistakable, and it became the first “1” in our pattern.
Step 2: The corrective move
No market moves in a straight line. The pullback is where many traders panic, thinking the trend is over. We used to fall for that trap too, closing trades too early. But within the 1-3 setup, this retracement is not a danger sign it’s a necessary step. On a forex chart like EUR/USD, the pullback often stalls around a support or resistance level, giving us the “2.”
Step 3: The confirmation point
This is where patience pays off. We wait for the market to prove itself with a candle close beyond a key level. That’s the “3.” When trading stocks, we saw this work beautifully on Tesla’s breakout after a pullback. The confirmation candle gave us the green light, and the move that followed justified the wait.
Across markets whether forex, crypto, or equities the pattern works the same. A strong trend, a pause, and then confirmation. Seeing it play out on different assets made us trust it even more, because it wasn’t tied to one market’s quirks.
Summary: The 1-3 setup has three parts: a strong trend, a corrective pullback, and a confirmation entry. Each part matters equally, and together they form a framework that helps traders across forex, crypto, and stocks move from guessing to structured decision-making.
3. How to identify the 1-3 setup on a chart
Spotting the 1-3 setup trading patterns in real time can feel tricky at first. Charts move fast, candles form and disappear, and emotions cloud judgment. We know this because we used to misread it constantly seeing “setups” that weren’t really there. Over time, we learned to rely on a few technical signals that made recognition clearer.
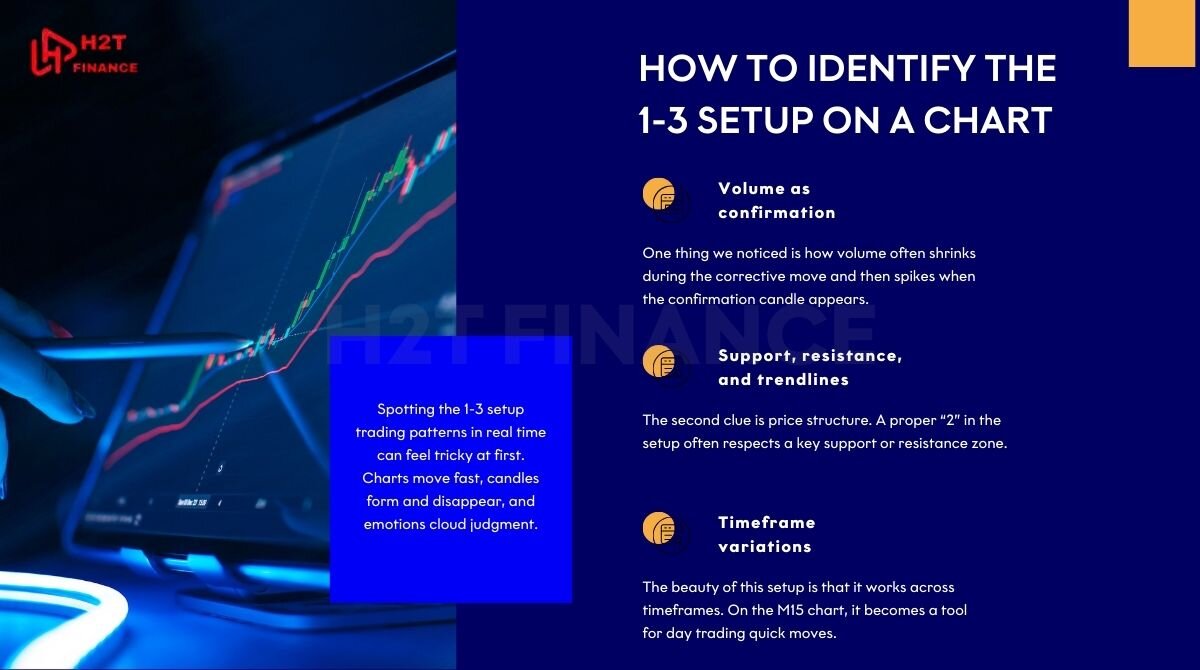
Volume as confirmation:
One thing we noticed is how volume often shrinks during the corrective move and then spikes when the confirmation candle appears. On crypto charts, especially BTC/USDT, this difference is obvious. Waiting for that surge kept us from entering too early.
Support, resistance, and trendlines:
The second clue is price structure. A proper “2” in the setup often respects a key support or resistance zone. On forex pairs like GBP/USD, we’ve seen the corrective leg bounce cleanly off a trendline, which gave us confidence that the move wasn’t random noise.
Timeframe variations:
The beauty of this setup is that it works across timeframes. On the M15 chart, it becomes a tool for day trading quick moves. On H1, it suits intraday swings. And on D1, it helps position traders ride longer-term trends, similar to how a forex market time zone converter helps you adapt across sessions.
Personally, we’ve had the best results on H1, where the signals are not too noisy but still frequent enough to practice discipline.
Mistakes beginners often make:
We once sketched countless “1-3 setups” on charts, only to realize later that we were forcing patterns where none existed. New traders often rush in, drawing confirmation points on weak trends or ignoring the bigger market context.
We learned the hard way that a weak “1” leads to a weak setup. Another common mistake is jumping in before the confirmation candle closes, which almost always ends in frustration.
To recognize the 1-3 setup, focus on volume behavior, respect for support/resistance and trendlines, and adapt your analysis to different timeframes. Avoid rushing the process misidentifying the structure or entering without confirmation is the fastest way to turn a reliable setup into a costly error.
4. Trading strategy with the 1-3 setup
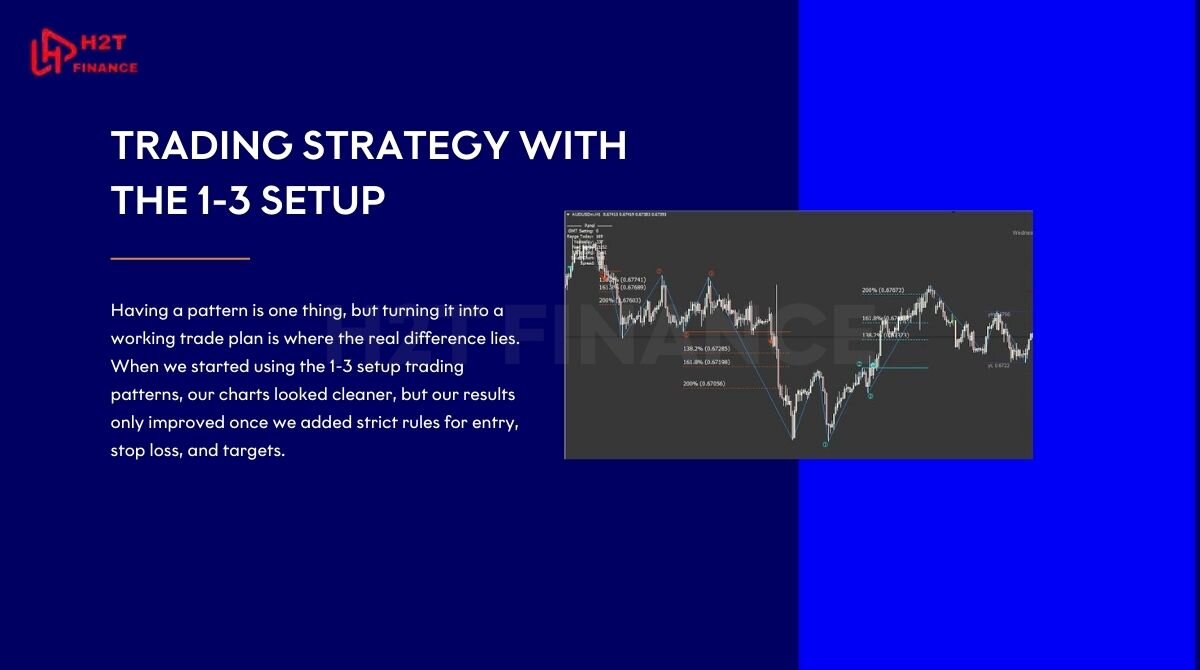
Having a pattern is one thing, but turning it into a working trade plan is where the real difference lies. When we started using the 1-3 setup trading patterns, our charts looked cleaner, but our results only improved once we added strict rules for entry, stop loss, and targets.
4.1. How to enter a trade: Entry, stop loss, and take profit
The entry point comes after the “3” confirms the trend. For us, that means waiting for the candle to close, not jumping in mid-move. We still remember a trade on USD/JPY where we got too excited and entered before confirmation price reversed instantly, and the setup was wasted. Since then, we only act once the chart proves itself.
Stop loss placement is crucial. We usually set it just below the corrective low in a bullish setup or above the corrective high in a bearish one. It’s tight enough to protect us but wide enough to avoid random noise.
Take profit levels depend on the trend’s strength. Often, the first logical target is at least twice the stop loss distance. Watching the price hit that level on a clean 1-3 move feels like proof that discipline pays.
4.2. Common risk-to-reward ratios
The risk-to-reward ratio is the backbone of this strategy. Our go-to is 1:2, meaning we risk one unit to make two. In our backtesting, this balance kept us in the game even when only 40–50% of trades were winners. On stronger setups, especially during trending crypto markets, we’ve stretched it to 1:3 or beyond.
Read more: Formula for risk ratio: How to calculate and use it in real-world investing
Once, during Ethereum’s bull run, we held a 1-3 setup trade longer than usual, aiming for 1:4. The patience was nerve-racking, but the outcome reminded us why sticking to ratios instead of emotions changes the game.
4.3. Using indicators for confirmation
While the 1-3 setup can stand alone, combining it with indicators adds confidence. RSI helps us avoid entries when the market is overbought or oversold. MACD highlights momentum shifts that align with the setup. Fibonacci retracements often show where the “2” pullback might end 38.2% or 61.8% levels are common.
One memorable case was on gold (XAU/USD). The pullback lined up perfectly with the 61.8% Fibonacci level while RSI hovered near neutral. When the confirmation candle closed, everything lined up, and the trade played out smoothly.
A solid 1-3 setup strategy means entering after confirmation, protecting with clear stop losses, targeting at least a 1:2 risk-to-reward ratio, and using tools like RSI, MACD, or Fibonacci for added conviction. The key is not just spotting the pattern but applying rules that turn it into a disciplined plan.
5. Advantages and limitations of the 1-3 setup
Every trading pattern has its strengths and weaknesses, and the 1-3 setup trading patterns are no exception. When we started applying it, the positives stood out quickly, but the challenges also tested our patience. Let’s break them down.
5.1. Advantages
The strengths of this setup are what made us trust it in the first place.
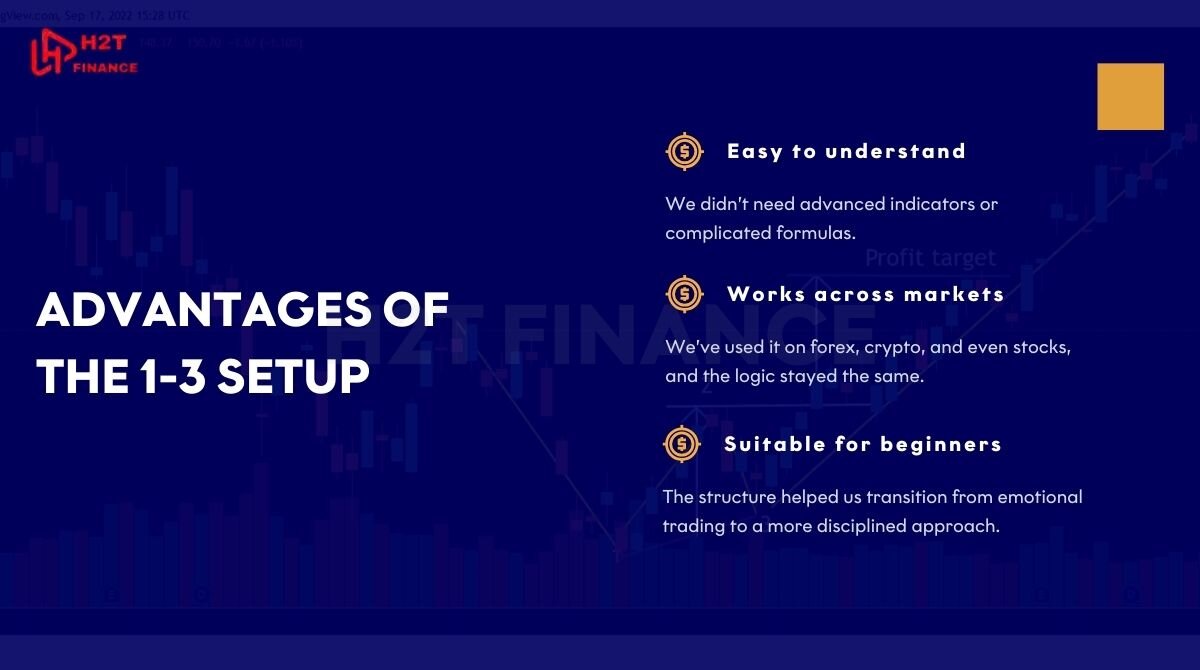
- Easy to understand: We didn’t need advanced indicators or complicated formulas. Just three clear steps made it approachable.
- Works across markets: We’ve used it on forex, crypto, and even stocks, and the logic stayed the same.
- Suitable for beginners: The structure helped us transition from emotional trading to a more disciplined approach.
5.2. Limitations
Of course, there are downsides. We’ve faced them firsthand, especially in choppy conditions.
- Vulnerable in sideways markets: During consolidation phases, false signals appear more often.
- Requires strict discipline: Entering too early or ignoring confirmation ruins the setup completely.
- Emotional traps: Waiting for the “3” sometimes feels endless, and impatience often costs money.
5.3. Advice for traders
Through experience, we learned that this setup works best when combined with other layers of analysis.
- Blend price action with indicators like RSI or MACD.
- Pay attention to market context trend strength matters more than the pattern itself.
- Backtest and practice on demo accounts before risking real capital.
The 1-3 setup is simple, versatile, and beginner-friendly, but it struggles in sideways markets and demands discipline. The best way to maximize its value is by combining it with broader analysis and sticking to clear rules.
6. Case study: Practical examples of the 1-3 setup
The best way to understand the 1-3 setup trading patterns is to see them in action. We’ll share two trades that left a strong impression on us, one from forex and one from crypto. Both taught us lessons we still carry today.
6.1. EUR/USD forex trade
During a volatile London session, EUR/USD was trending strongly upward. That was our “1.” Soon after, the pair pulled back to a previous support zone, forming the “2.” Instead of jumping in immediately, we waited for the “3”, a bullish confirmation candle closing above the minor resistance.
We placed the entry right after confirmation, set a stop loss just under the corrective low, and aimed for a 1:2 risk-to-reward ratio. The trade worked beautifully. Within hours, the price hit our target. The win wasn’t just about profit, it reinforced the discipline of waiting for confirmation instead of guessing.
6.2. BTC/USDT crypto trade
On the crypto side, BTC/USDT gave us a memorable example during a trending market. Bitcoin surged above $30,000, marking a clear “1.” Then came a sharp pullback that shook out impatient traders. We stayed calm and marked that dip as our “2.”
The confirmation came with a strong bullish engulfing candle on the H1 chart, backed by rising volume. That was our “3.” We entered with a modest position, stop loss below the corrective low, and a target set at 1:3 R:R. Watching Bitcoin rally from that point was exciting, but what mattered most was seeing the pattern play out exactly as designed.
From these trades, we learned that patience and structure make all the difference. The setup worked in both forex and crypto, but only because we respected the rules. Entering too early or ignoring volume could have turned both trades into losses.
7. Common mistakes and how to avoid them with the 1-3 setup
Even though the 1-3 setup trading patterns are simple in structure, applying them is not always easy. We’ve made our share of painful mistakes, and they cost us money, sleep, and confidence. But each failure also showed us how to trade smarter the next time.
7.1. Entering too early or too late
One of our earliest struggles was impatience. We often jumped in before the confirmation candle closed, thinking we’d “catch the move early.” More often than not, the market punished us with a reversal. On the other hand, waiting too long sometimes meant missing the move entirely.
Fix: We learned to stick to one rule: No confirmation, no trade. It felt boring at times, but this discipline saved us from countless false breakouts.
7.2. Ignoring confirmation signals
We also ignored extra clues, like volume or support/resistance. Once on GBP/USD, we saw what looked like a perfect 1-3 setup, but volume didn’t support the breakout. We traded anyway, and the price collapsed. That single mistake convinced us to never overlook confirmation signals again.
Fix: Always double-check the setup with technical signals. If one part feels off, step aside. The market will give another chance.
7.3. Trading too big without risk management
There was a time when we felt overly confident and placed large positions on a 1-3 setup during Ethereum’s run. The trade failed, and the loss was brutal not because the setup was wrong, but because our size was reckless.
Fix: We now risk a fixed percentage per trade, no matter how “perfect” the setup looks. A controlled position size makes every loss survivable.
The most common errors with the 1-3 setup are impatience, ignoring confirmations, and risking too much. By respecting rules, using signals, and applying strict risk management, beginners can turn mistakes into lessons and keep growing with the strategy.
Read more:
8. Conclusion and next steps for new traders
The 1-3 setup trading patterns are not a magic formula, but they are a reliable framework that helps traders move from emotional guessing to structured decisions. We’ve seen how a simple three-step structure trend, pullback, confirmation can turn chaotic charts into something that feels manageable.
For beginners, the most important step is practice. We strongly encourage starting on a demo account before risking real capital. That’s how we built trust in the setup without the fear of losing money. The more we practiced, the more natural it became to wait for confirmation, manage risk, and aim for healthy risk-to-reward ratios.
Trading will always carry uncertainty, but discipline and patience make the difference. The 1-3 setup can be your foundation, but your growth depends on how consistently you apply it. At H2T Finance, we believe the Forex Strategies category exists to give traders like you clear, practical systems to survive and grow in the markets.